Installing a home theater system isn’t just a matter of buying a big TV or a state-of-the-art projector. In fact, perceived image quality depends as much on the installation as on the equipment itself. Light pollution, incorrect screen size, approximate placement or careless settings: these are all common mistakes that can turn a promising installation into a source of frustration.

Home theater: why certain mistakes can ruin picture quality
Many users invest in high-performance equipment without considering their viewing environment. Yet a room with too much light, bright walls, an unsuitable viewing distance or a poorly chosen screen can considerably degrade the contrast, colors and clarity of the picture. The result is often a dull, unimmersive image that’s even tiring to watch.
Added to this is the growing complexity of today’s technologies. Between the different types of projectors, the multiple HDR formats, placement constraints and brightness management, it’s easy to make mistakes… sometimes costly ones. Hence the importance of clear, structured recommendations based on experience in the field.
A practical guide to avoid the most common pitfalls
This is precisely the goal of our “10 home theater mistakes to avoid (image)” guide. Aimed at both beginners and enthusiasts wishing to optimize their setup, it reviews the most common mistakes that affect image quality, whether you’re using a 4K UHD TV or an Ultra HD projector.
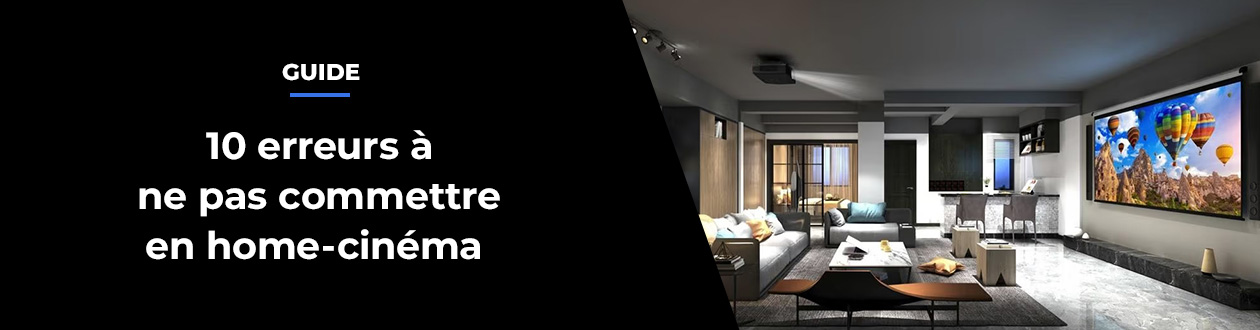
The guide tackles essential points that are often underestimated. It starts with light pollution, the real enemy of contrast, explaining how ambient light, reflections or even wall color can alter the image. It then turns to the projection surface, pointing out that a poor-quality screen, or no screen at all, can ruin the performance of even a high-end projector.
Other chapters help you avoid classic installation errors, such as choosing a screen size that is unsuitable for the viewing distance, using a projector that is too bright or not bright enough, or neglecting placement constraints regarding the lens, projection distance or lens shift. All of these technical parameters, if not properly controlled, can result in an image that is distorted, blurred, or uncomfortable to view.
The guide is not limited to the projected picture. It also deals with practical but crucial subjects, such as the noise and heat of projectors, the quality of HDMI cables and accessories, and the importance of properly calibrating the image of your TV or projector, even when they offer default cinema modes.
An indispensable tool for a truly optimized image
Clear, instructive and illustrated, this guide can be used as a checklist for designing or improving your home theater installation. It enables you to anticipate errors before you buy, and also to quickly identify areas to be improved in an existing installation.
Whether your home theater is installed in a living space or a dedicated room, the “10 home theater mistakes to avoid (image)” guide helps you get the most out of your equipment, for a more faithful, immersive image that’s closer to the creators’ intentions.
Would you like to learn more about different video projection technologies, get advice on how to choose your screen and find out how far away to sit in relation to image size? Take a look at the following guides: